Banner Management allows you to place banners on your site and have the system automatically track the number of page views, clicks, and timing. You can set up multiple banners each with its own set of criteria and the system will automatically display the next banner on a page refresh.
How to Install the Banner Add-On
Click here for information on Installing Add-Ons.
How to Add a Banner to a web page
When you are on the web page where you would like the banner to appear and are logged on as an Administrator, you will select the EDIT option from the menu. Next, click the paper/pencil icon. This will take you to the Edit record for your page, shown below:
On this screen put your cursor in the Copy box, click on the Add-on drop down menu and select Banner Campaign. An image with the Contensive logo will appear in the Copy Box. Click OK at the top of the page to save the banner to your webpage.
After you click OK, you will return to the webpage with the banner, where you will see the following:
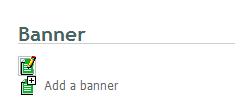
From this screen you will see the links to manage the banner. The links allow you to add a new banner or modify an existing one.
Adding A New Banner
To add a new banner, click the + next to ADD A BANNER, which opens up a new banner record where you can specify the banner name, specify an expiration date for the banner, select the campaign for this banner, upload an image, specify width and height of the image, add a caption, and include a link to a webpage when someone clicks on the banner. Click OK to save the new record.
Editing A Banner
To edit a banner record, click the paper/pencil icon next to the banner, which opens up the current banner record where you can make changes to any information in the record. Click OK to save the changes.
Adding A New Banner Campaign
To add a new banner campaign, login and click on ADMIN. Go to MANAGE ADD-ONS, BANNER CAMPAIGNS, and then BANNER CAMPAIGNS. You will see a list of all banner campaigns added to the website. Click ADD to add a new banner campaign record. A new banner campaign record will open where you will name the campaign. Click OK to save the new record.
Selecting A Banner Campaign for a Webpage
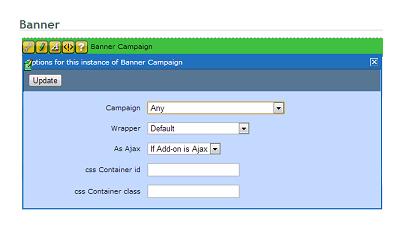
To select which banner campaign will run on a specific webpage, login and click on ADVANCED EDIT. Click on the WRENCH ICON shown in the screenshot below. Choose the campaign from the drop down menu and click UPDATE to save changes.
Notes:
Width- This allows you specify the width you want the banner to adhere to. This should only be used if you are supplied with a banner that does not conform to your specifications. The system will automatically stretch or shrink the banner to match your field entry.
Height- This allows you to specify the height you want the banner to adhere to. This should only be sued if you are supplied with a banner that does not conform to your specifications. The system will automatically stretch or shrink the banner to match your field entry.
Caption- This is the text that will appear in the alt tag for the banner
Date Expires- This is the last date you wish the banner to show up on the site.
Link- If you wish to have the banner link to another webpage you can specify that link in this field.
Clicks- This is the total number of click-throughs the banner has produced.
Clicks maximum- This is maximum number of clicks that you will allow the banner to have. Once the maximum number of clicks is reached, it will no longer display on the site even if the date expires has not yet happened.
Viewings- this is the total number of page views for the banner.
Open In New Window- If a link has been added and you width that link to open a new window click this box.
Align- this is how you wish the banner o be aligned on the page your HTML options are as follows; Left, Right, Top, Bottom.
Date Last Viewed- This is the last date the banner was displayed on the site for viewing.