The Dynamic Image Gallery add-on enables you to add a page with a rotating display of images on your website. The following major features are included:
- Multiple galleries on one site
- Navigation to handle many images
- Slide show to automatically rotate through images
- Ability to add captions to photos
Installing the Dynamic Image Gallery
Click here for information on Installing Add-Ons.Adding/Editing Dynamic Galleries
To add a new gallery to your website, LOGIN and go to ADMIN. Click on MANAGE ADD-ONS, DYNAMIC IMAGE GALLERY and then DYNAMIC GALLERIES. This will open a list of all image galleries currently available on your site. To add a new gallery, click on the ADD button. You will enter the name of the new gallery and click OK to save it.
If you want to edit a gallery name, click on the paper/pencil icon next to the gallery in the list of all image galleries to open the record you want to change. Then type the new gallery name in the name field and click OK to save changes.
Adding/Editing Images
To add images to a photo gallery, LOGIN and go to ADMIN. Click on MANAGE ADD-ONS, DYNAMIC IMAGE GALLERY and then DYNAMIC GALLERY IMAGES. This will open a list of all images currently available on your site. To add a new image, click on the ADD button. You will see the screen below:
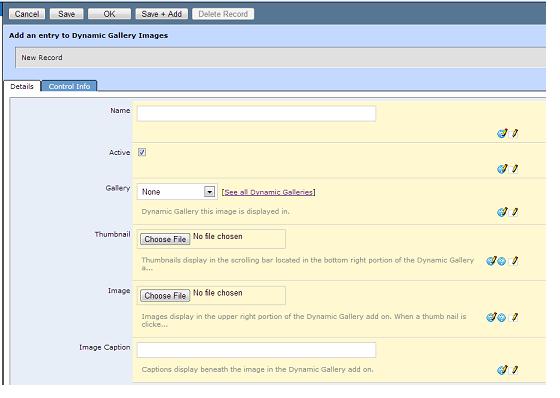
Here you will enter the name of the new photo and choose which image gallery it is included in using the drop down list. You will also select the thumbnail and large image files (by clicking on CHOOSE FILE to upload a photo from your computer). Next, you will type in a CAPTION, which is the text displayed at the bottom of the large image. Click OK to save changes.
(NOTE: The image sizes for the Dynamic Gallery are Thumbnail: 91px X 90px and Image: 465px X 378px)
If you want to edit an image, click on the paper/pencil icon next to the image in the list of all images. This will open the record for the image you want to change. From here you can type a new name, change the gallery it is included in, change the image files by clicking on CHOOSE FILE, or change the caption. Click OK to save changes.
Adding a Gallery to a Page
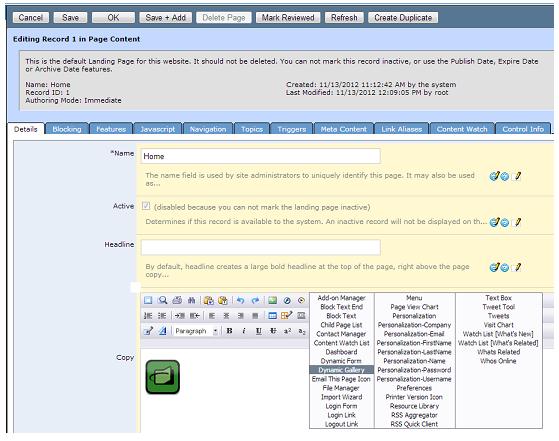
When you are on the web page where you would like the photo gallery to appear and are logged on as an Administrator, you will select the EDIT option from the menu. Next, click the paper/pencil icon. This will take you to the Edit record for your page, shown below:
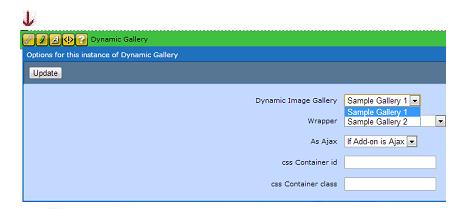
To change which gallery is being used on a specific page, go to the page you want to change, login and select ADVANCED from the menu. Click on the wrench in the menu above the picture, as shown below. In the DYNAMIC IMAGE GALLERY drop down, select the gallery you want to use on that page. Click UPDATE to save the changes.