Purpose
The Image Slider 3 enables you to put a slideshow on a web page. After you drop the add-on on your webpage, with images, you will see something like the following screen:

How to Install the Image Slider3 Add-On
Click here for information on Installing Add-Ons.
Adding, Modifying and Deleting Images
To change the images shown in the slide show, login and go to ADMIN. Go to MANAGE ADD-ONS, IMAGE SLIDER3 and then click on IMAGE SLIDER IMAGES. You will see a list of all images previously uploaded for the slide show. Click ADD to add a new image or click on the paper/pencil icon next to the image you want to modify. The image record will display, as shown below:
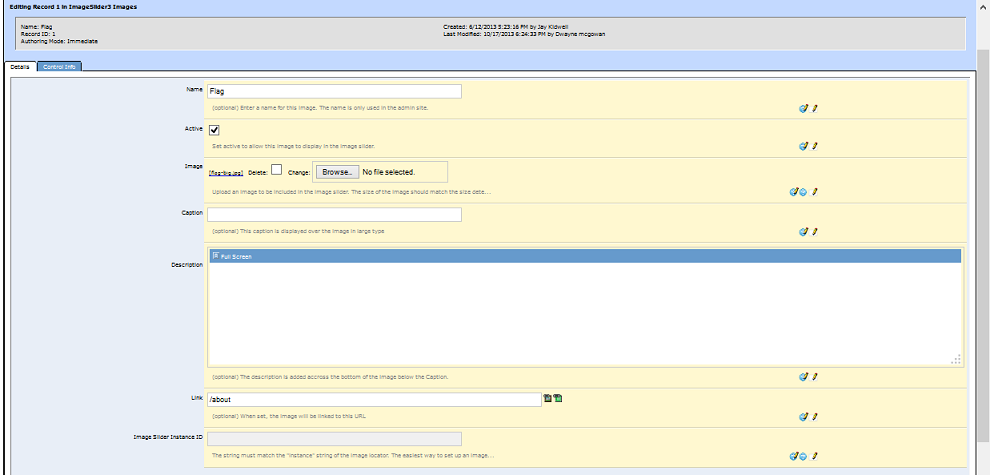
You will name your record so that you can recognize which image the record contains. Make sure ACTIVE is checked if you want the image to show in the slideshow, or if you don't want to use it anymore, click on the check mark to remove it. To upload an image click on CHOOSE FILE to search your computer; click on the file you want and then click OPEN. You will see the file name displayed in the image record. If you want this image to link to another webpage for more information include the URL of the page in the LINK field. You can also add a caption and/or description to the image. Click OK when you are done to save your image record.